In case you haven’t heard, kale will probably save your life. If you’re drowning, kale will swim out and rescue you. If you’ve fallen and you can’t get up, kale will call an ambulance and get you a pillow while you wait.
Luckily, kale can also be pretty tasty. Is there nothing you can’t do, kale?
Kale also does great work as a counselor. If you’ve had too many, oh, I don’t know, Cadbury eggs recently, a bowlful of kale with a zingy dressing will assuage your guilt.
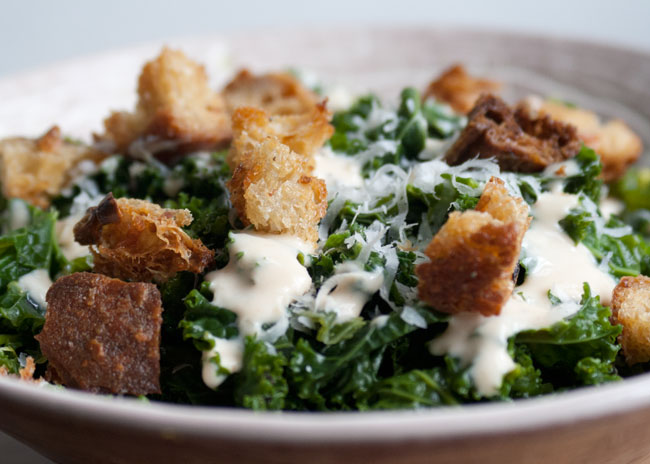
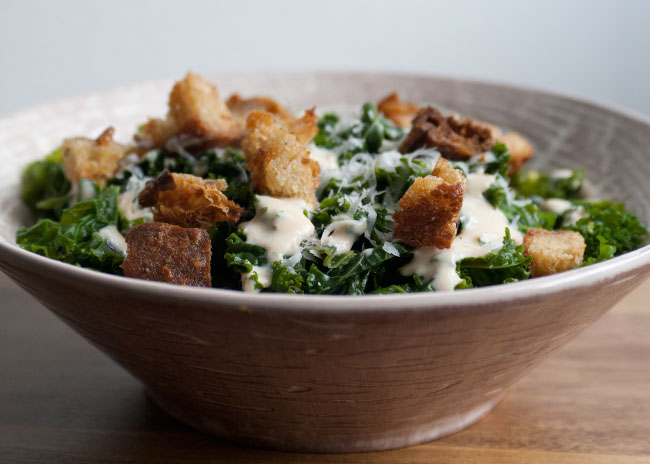
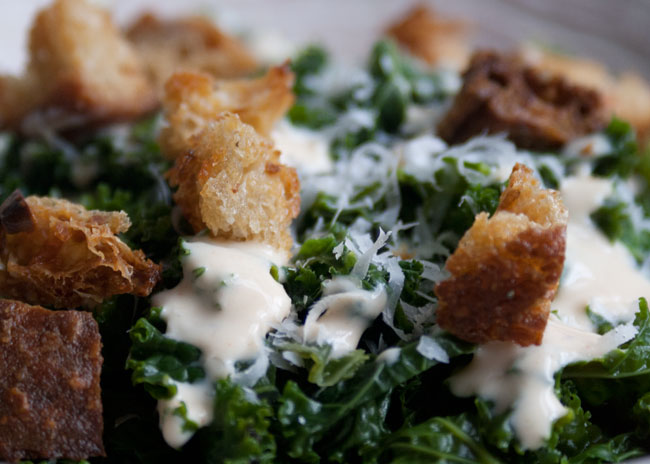
It’s a simple concept, a kale Caesar salad. Strip it, steam it, dress it, eat it.
A kale protip I only learned recently: After thoroughly washing it, you can strip the leafy parts from the stems. Just tear it off from top to bottom easily.
Skip the croutons if you’re gluten-free, or just make them with GF bread. I’ve never used it for croutons myself, but apparently it works.
Psst… If you’re looking for a dairy-free (or vegan) version, you can always substitute the yogurty Caesar for this tahini dressing. Just saying…
Serves Serves 2
15 minPrep Time
20 minCook Time
40 minTotal Time
 Save Recipe
On the Counter
- 2 slices of barely-stale loaf bread, ideally sourdough, and ideally not sliced bread
- 2 tsp olive oil (extra virgin if you have it)
- 1/4 tsp salt
- a few grinds of fresh black pepper
- 100 g kale without stems
- 1/4 tsp table salt
- 1 tbsp olive oil
- Juice from 1 lemon wedge
- Parmesan or vegetarian hard cheese
- 2 tbsp plain unsweetened yogurt
- Lemon juice from about 1/4 of a lemon
- A dash of Worcestershire sauce, or 1/8 tsp vegetarian miso paste
- 1 medium clove garlic, minced finely. (Don't use a garlic press as it will be too strong)
- Pinch of ground sea salt or table salt
What to Do
- Chop your bread into about 2 cm (0.5 in) cubes. If it's very stale, you might need to drizzle oil on it to start and give it a few minutes to soften before chopping. If you do, skip the oil in the next step.
- Preheat the oven to 180C (350F). Toss the bread cubes, pepper and salt together.
- On a rimmed baking sheet or dish, spread the cubes out so they're one even layer.
- Bake for 5 minutes.
- Toss them around so other sides get exposure.
- Bake for a few more minutes, until golden brown, but check on them frequently.
- Thoroughly rinse and dry the kale.
- From the bottom strip the leaves from the stems in as few tears as possible.
- Lightly salt the torn kale leaves.
- In a steamer over a boiling pot of water, steam the kale for 5 minutes or until tender and still a vibrant green.
- Once it's ready, rinse it under cold water or give it an ice bath. You don't want to cook it any longer.
- Now, either rub (or toss if you're feeling lazy) the leaves with olive oil, then add a few squeezes of fresh lemon juice and toss it together.
- You can make the dressing in advance, or while the kale is steaming.
- Combine yogurt, lemon juice, garlic, salt, Worcestershire sauce. Stir together thoroughly.
- Once it's finished, top the kale with dressing, croutons and some freshly grated Parmesan or vegetarian hard cheese.

I’ve seriously been on a smoked paprika kick lately. It’s one of my favorite spices to start with, and I just love smoky flavors, but lately I’ve wanted it on everything! I’ve been trying it with some of my staple dinner ideas, for a bit of a variation, which is how this came to be. It’s quite similar to the baked haddock recipe, but with a bit more smoky goodness and bonus side vegetables.
There’s a shop in Brixton, in south London, where you can bag your spices and all sorts of interesting plant-derived things, and they are my suppliers for smoked paprika. With the opportunity to get as much as I want, I thought I overdid it – but with the speed at which we’ve emptied the first jar’s worth, I think I made out like a bandit, in the end.
If you don’t love smoky paprika (but seriously, how could you not) you can use sweet paprika, or … skip it entirely, though you’ll be missing out. If you don’t love cilantro/coriander on the other hand, just replace it with parsley. While I’m lucky enough that it doesn’t taste like soap to me, I feel for you if it does.
Note: I wouldn’t recommend reheating the fish, as it loses its soft flakiness and just turns rubbery, which is not tasty, no matter how much smoked paprika you put on top.
Recipe note: Add the carrots in first, give them 10 minutes, add the fish, give it 10 minutes, and then add the broccoli for 10 minutes.

Smoky Baked Cod
Serves: 4
On the Counter
4 fresh sustainable cod filets, about 4 in (10 cm) long and 1 in (3 cm) thick (can substitute with pollack or haddock)
6-8 cherry tomatoes
1 banana shallot or 3 regular shallots
2 cloves garlic
5-6 fresh sprigs cilantro/coriander (or parsley), leaves stripped from the stems
1 tsp. salt
2 tsp smoked paprika + 1 tsp set aside
1 tbsp olive oil + 1 tsp set aside
1 tsp cayenne pepper powder
What to Do
Mince the garlic, slice the shallots and quarter the tomatoes. Drizzle with 1 tsp olive oil and toss to combine, adding 2 tsp. of smoked paprika. Set aside.
Chop your herbs of choice. Combine the 1 tbsp. olive oil, cayenne pepper, herbs, 1 tsp. smoked paprika and salt. Coat each fish piece and set it aside for up to 10 minutes.
Preheat the oven to 425 F (220 C).
Line a baking sheet with parchment paper or foil. If the fish are not well coated in olive oil, drizzle a little onto the paper/foil and lay the fish pieces on top. Spoon the vegetable mix on top of the cod.


Roasted Paprika Carrots and Broccoli
On the Counter
1 head broccoli, cut into florets, without main stem
8-10 carrots (depending on size)
2 tbsp olive oil, divided
6 sprigs cilantro/coriander, (or parsley) leaves stripped from the stems
2 tsp. smoked paprika
2 cloves garlic, minced
2 tsp. salt
What to Do
Preheat the oven to 425 F (220 C).
Slice the carrots thinly on the diagonal, about 1 cm thick (just under 1/2 inch). Chop the coriander and combine it with the paprika, garlic, olive oil and salt. Divide the mixture into 2.
In one bowl, toss 1/2 the spice oil with the broccoli. In another bowl, toss 1/2 the spice mix with the carrots.
Line a large baking sheet with foil, and spread the carrots widely. (If you don’t have a big enough tray, you can cook them separately – like I did.)
Roast the carrots for 20 minutes. Add the broccoli onto the baking sheet and roast for an additional 10 minutes.
]]>
I think I’m a little late with this post! I meant to share it about a month ago and apparently I had blog-amnesia, as I completely forgot to. So while this post is a little tardy, maybe it’s still worth putting out there.
There’s a mysterious vegetable in the US that gets the farmers market shoppers all riled up in April and May. It’s not asparagus (but talk about an amazing spring veggie), it’s ramps.
Ramps are, in effect, tiny wild onions. The UK equivalent of these lovely, fresh and slightly pungent greens are wild garlic. The main difference is that you can buy ramps with the bulbs still attached, while wild garlic will get to you as long, plain leaves that feel kind of silky.

It’s a super limited time veggie, and while it’s not the most amazing thing you’ll ever eat in your life (ramps OR wild garlic), it’s pretty darn good.
Not as strong as garlic on its own, but with a beautiful green color and a lovely, fresh flavor… there was really only one thing that I could do with my bounty. Turn it into pesto.
Pesto is absurdly easy, and it’s almost impossible to mess up the taste, since you can trial it along the way. You can make it from a variety of ingredients, and I’ve definitely had my fair share of pesto variations. I intend to share a few more pesto types that I make, with recipes and ideas on how to use them.

I also love that pesto is freezable. I’ve read recommendations that you freeze it without cheese, but I’ve never had a problem with the taste, as long as you use it within 3 months and you’ve sealed it well. Add a little bit of lemon juice to help it keep its vibrant green color (to help prevent oxidation). It’s spring in a plastic baggie.
Tip: Pulse, taste, tweak, pulse, taste, tweak … until you’re happy with the flavor.
On the Counter
100g (about 1/2 cup or 2 big handfuls) of wild garlic leaves, or ramps, roughly chopped
200ml (about 1 cup) extra virgin olive oil
50g (1/3 cup) pine nuts or walnuts
50g (1/2 cup) Parmesan cheese (or Grana Padano), grated
1/2 tsp chilli (red pepper) flakes
salt to taste
What to Do
In a food processor, add the wild garlic leaves (or ramps) and nuts.
Pulse for about 5 seconds to combine.
Slowly drizzle in the olive oil, pulsing to combine. (If you can’t do this, just add 1/3 of the olive oil, pulse, another 1/3, pulse, and the rest.
Add in the parmesan and chili flakes and blitz to combine.
Taste, add salt if needed, briefly pulse.
I suggest that if you’re having it with pasta, try orichiette or shells for little pockets of garlicky pesto. You could also have it on a steak, mixed into mashed potatoes… or on anything you can dream up.
]]>
Cooking is about much more than a recipe and a stock of ingredients in the house. I’m the kind of person who likes to shop for groceries and food, and the more options, the better. You can sometimes find me agonizing over the perfect lemons or the biggest head of garlic.
One of my favorite places to shop for those ingredients in London probably isn’t the first place people would expect. Maltby Street market has great food to snack on and speciality items to take home, Borough Market is the foodie’s paradise in London, and North End Road is the place for those who like an old-fashioned working class London experience.
However, my personal favorite has to be Brixton Market. Brixton has everything from measure-your-own spices to the freshest shrimp, with the cheapest vegetables and some of London’s best Neopolitan-style pizza in between.

Recently I introduced a good friend and fellow blogger, Natalia, to the joys of Brixton market. We wandered between market arcades, visited shops, stopped at a few stalls and took lots of photos along the way. Check out her blog post about our day on her blog Nat w Londynie (note: it’s in Polish)

I got to spend a little time being a London Tour Guide (which doesn’t happen very often… the accent probably puts people off) in this slightly off-the-beaten-path neighborhood that isn’t actually very far from Central London. As I write this, I again have the Eddy Grant song “Electric Avenue” in my head, which was written about Brixton’s Electric Avenue, the first market street in London to be lit by electricity.


We picked up quite a few things, like shrimp at Jeffries Fish Market, inside Market Row, across from Franco Manca, where you can get some of London’s best pizza. I love Jeffries (and Franco Manca, for that matter). The seafood is affordable, with a great (fresh!) selection and the nicest people. I would go out of the way for their shrimp – the best I’ve had in London, by far.


Plus there’s Nour Cash & Carry, a wholesale, cash-only store where you can buy all sorts of bulk foods, cheap (so cheap!) fresh vegetables and herbs and some really interesting, unusual things. Definitely not the kind of stock you can find at the local Tesco.


Lots of meals have come from my purchases in Brixton, but this one is symbolic of a day roaming between market arcades and local stores in Brixton.
Polenta with Shrimp and Tomato Sauce

Serves: 4
On the Counter
soft polenta:
2 cups (340 g) coarse-ground corn meal (polenta)
8 cups (2 liters) water
1 tbsp coarse sea salt
2 tbsp unsalted butter
tomato and shrimp:
1.5 lbs (700 g) fresh shrimp (prawns), peeled
1 can peeled plum tomatoes
2 cloves garlic, minced
1 shallot, finely diced
1 tbsp olive oil
1 tsp tomato paste
1/2 tsp chilli flakes
1/2 cup (100 g) fresh or frozen shelled peas
crumbled feta to garnish
fresh parsley or cilantro to garnish
salt and pepper to taste
What to Do
Start the polenta by boiling the water in a large pot over high heat, with salt. Slowly whisk the corn meal in, until smooth. Simmer, covered, on lower heat for 15-20 minutes, stirring occasionally. Taste for desired consistency. Once it’s cooked, whisk in the butter until completely melted.
Meanwhile, in a medium saucepan, heat the olive oil until shimmering. Add garlic and shallot, cook for 2 minutes, or until shallot is translucent. Add in chilli flakes and tomatoes, and break up with a wooden spoon. Add tomato paste and about 1/2 tsp salt, stir to combine. Cook for 15 minutes, tasting, until sauce is mostly smooth. Add more salt if needed. Toss in shrimp and peas, and cook for an additional 5 minutes, until shrimp is pink and opaque.
Spoon the polenta into bowls, top with tomato sauce and shrimp, top with feta and parsley/cilantro.
I got nearly every ingredient for this (including the salt!) from Brixton market, so this meal really was a reminder of an interesting Saturday and the joys of shopping around for quality ingredients.
]]>

I know, another pasta-based recipe, but it’s summer! For me, warm weather and fresh vegetables means as little time and effort as possible and as much tasty fresh vegetable goodness as I can get. Plus, today was the perfect day for a light and easy pasta lunch.
The gentleman and I spent the first half of today, a perfectly amazing example of summer, swimming, bobbing and sunning at an outdoor pool.
It might have looked like this…

After a few hours in the pool, lunch had to be the right combination of filling but not too heavy. Swimming works up quite an appetite, but I was interested in spending as little time as possible near the stove.
A quick dig around in the fridge and I had a pile of mushrooms and some green onions. Paired with fresh basil, fresh pasta and some parmesan cheese, we were in the running for lunch. I’d like to try this with some walnut pieces tossed in, but unfortunately there weren’t any at home so … next time.
If you’re using fresh pasta, sauteeing the mushrooms and cooking the pasta will take the same amount of time. If not, start the pasta, and with about 5 minutes left, start heating up the oil. The whole thing, including chopping, should take about 10-15 minutes.
After lunch it was time for some homemade iced coffee and the Wimbledon final. I may not be from the UK, but it’s not hard to get swept up in the Andy Murray fever, and to watch Britain win its first men’s Wimbledon final in 77(!) years. Pretty exciting, especially when paired with caffeine.
It’s quite possible that I wrote this sitting on the balcony; the smell of basil, the sounds of the neighborhood and the touch of a gentle breeze made this one of the most pleasurable posts to write. Days like this just don’t happen often enough.

Serves: 2
On the Counter
7 oz (200 g) fresh tagliatelle
4 medium portobello mushrooms, halved and sliced
2 cloves garlic, thinly sliced
2 green onions (scallions), sliced, separated into 2 piles
1/2 tsp red pepper (chili) flakes
6 fresh basil leaves, chopped
2 tbsp olive oil
2 tbsp extra virgin olive oil
freshly grated parmesan, (optional) to taste
What to Do
Heat a skillet or cast iron pan with 2 tbsp olive oil to medium-high heat. Once it’s shimmering (but not yet smoking!) add 1/2 of the green onions and mushrooms. Salt lightly and stir.
Meanwhile, add the tagliatelle to a pot of salted boiling water and cook for 4 minutes (or less depending on pasta) until al dente.
After 2 minutes of cooking the mushrooms, add in garlic and chili flakes, turn down the heat to medium. Stir until the mushrooms have darkened and softened, but not turned mushy.
Drain the pasta and mix with 2 tbsp extra virgin olive oil and the mushrooms. Top with basil, toss and onto the plate with it. Top with parmesan if desired.

(And also use a jam jar for drinking because all the glasses are in the dishwasher.)
I don’t think this needs any meat, especially since the mushrooms do a lot of that hearty umami work in this meal, and I just don’t like heavy lunches on hot days. And… without the parmesan, it’s vegan. If you’re skipping the parmesan, I might add a tiny bit of sea salt at the end, just for bit of texture and some of the seasoning that the parmesan offers.
]]>
This was the second-to-last meal of an unofficial challenge that I embarked on for two weeks in a rather long term between paychecks. It’s been two years and I still have trouble getting used to monthly (or sometimes once every 5 weeks) money.
The challenge I set myself was to go without shopping at the supermarket or going to a restaurant, but rather make all my meals from food I already had at home. (I did take some liberties on the weekends, when the gentleman was kind enough to shop for us both.)
While it was really nice to save the money those two weeks, I wouldn’t say that I did it t prove a point, except to myself about the amount of food that goes forgotten in my kitchen.
This was a pretty great use of things that I’d had hanging around my kitchen and uses a lot of staples. You could go without the red pepper (though I quite liked it) and possibly without the cream cheese, if you were feeling really desperate. It was a filling, really flavorful stew. Plus, it freezes well!
I made it healthier by ditching the cream, lowering the dairy and using processed corn kernels and a bit of flour to thicken it.
Serves: 4
On The Counter
1.5 cups whole corn kernels
1.5 cups corn kernels, run through a food processor
1 shallot, chopped
3 cloves garlic, chopped
1 red bell pepper, chopped
3 tbsp plain/all purpose flour
1.5 cups milk
3 tbsp cream cheese
3 cups warm vegetable stock/bouillon in boiling water
1 tsp dried parsley
1 tsp dried cilantro
1/2 tsp cayenne pepper (optional)
1 tbsp olive oil or butter
salt to taste
What to Do
In a large soup pot on low heat, saute the garlic and shallot in butter/oil, until shallots are soft. Add in bell pepper and cook for another 5 minutes, or until pepper is no longer crunchy. Sprinkle on 1/2 tsp salt and stir.
Add in flour, and mix until it starts to look like pastry dough. Whisk in vegetable stock and milk, until combined. Sprinkle parsley and cilantro.
In small spoonfuls, add in cream cheese and whisk to combine. Add in pureed and whole corn and cayenne pepper, if using. Add salt to taste. Heat for another 10 minutes, until heated through.
Serve!

I don’t normally have anything with this, as it’s rich and filling on its own, but if you really want a side, a bit of crusty whole wheat baguette would probably do it justice.
]]>
I really wish there were more hours in a day. I wrote a first draft of this post last week and lost it, unfortunately, but the fact that it took me nearly a month to even write this gets to me.
By the time I cook, I’m too tired to sit down and write about it at 10 pm. But, until someone makes a real life TimeTurner, my recipes will just have to wait patiently in the drafts queue.
This is probably my favorite thing to make for group dinner/lunch parties. It was for my first Burns Night, and I was joining the gentleman’s yearly tradition. In typical fashion, I spent far too much time stressing about what I’d bring to Burns Night dinner, even if I “didn’t have to bring anything.” Of course I had to bring something.
I finally settled on making herbed crepes with creme fraiche and Scottish smoked salmon, and even though I was sure it fit the theme, I still worried endlessly until I got my first positive (and unsolicited) review. Burns Night, by the way, is a celebration of the Scottish poet Robert Burns, with a main course of haggis and root vegetables.
Since then, I’ve made these several times, always with great success. The best part was when one of the gentleman’s friends asked me if I’d brought the crepes again. Appetizer jackpot!
Once you get the hang of making crepes (or pancakes for that matter), this is a pretty easy starter to do, and you can make it ahead, since it’s a cold dish.

Serves: 10-15 people, as long as no one’s late (they go quickly!)
On The Counter:
Crepes:
2 large eggs
1 cup (120g) plain flour
1 1/4 cup (300ml) milk
5 tsp (25g) butter, melted
1/4 cup (10g) fresh parsley, chives & dill, chopped
salt and white pepper (black is fine, but white looks better)
Topping:
1/2 cucumber, peeled, seeded and cubed
1/2 lb (225g) smoked salmon, finely diced
1 1/4 cups (300ml) crème fraîche
3 tbsp (5g) fresh parsley, chives & dill, chopped
What to Do:
In a large bowl, whisk the eggs until the yolks pop. Gradually add in flour, milk and melted butter. Add in chopped herbs and combine. Season with salt and white pepper to taste.
Let the batter sit for at least 30 minutes. Meanwhile, place diced cucumbers in a bowl and sprinkle salt on top. After 5 minutes, drain excess liquid. (You can also squeeze the cucumber between paper towels to remove more water.)
Melt a small amount of butter in a crepe pan or flat skillet over medium heat.
Fill an ice cream scoop and gently pour the batter so that it forms a thin circular layer. Cook for about 30 seconds, or until set. You should be able to flip it over easily. Flip it and cook for 30 seconds, until golden.
Repeat with all of the batter, stacking the crepes between sheets of parchment paper.
Place crème fraîche, 3 tbsp chopped herbs and cucumber into a medium bowl. Combine until well-mixed.
To serve, cut crepes into quarters. Top with a small piece of salmon and a generous spoonful of crème fraîche.

Apologies for the lack of good final dish photo… I didn’t get take a very good one before the hungry hordes descended!
]]>
Have I mentioned that I like macaroni and cheese? Cuz I really do. I like all sorts of variations, from stovetop to baked, to Velveeta and broccoli, to pumpkin…
But this version… whoa. I do not normally have portion control issues, and I’m pretty good at saying no to seconds, but this mac and cheese had me back in the kitchen FOUR times. Just too good. (I suspect some of the healthier attributes of this particular mac & cheese were probably undone by having 4 portions of it.)
I modified the inspiration recipe by halving the cheese sauce, dropping some of the cheeses and chopping up pretty much every vegetable I had in my fridge. This recipe was great for using up both cheddar and carrots that had been sitting around for a while.
If you want the full-on cheesy experience, I suggest using the proportions and ful ingredients from the original recipe at Ezra Pound Cake, or doubling what you see below.
Check out all those veggies…

Serves: 6-8
On the Counter
1.5 tablespoons olive or vegetable oil
1/2 (58 g) cup small radishes, quartered
3/4 cup (130 g) broccoli (with stems), chopped
3/4 cup (175 g) carrots
1 medium onion, chopped
3 cloves garlic, diced
8 oz (227 g) elbow macaroni or other small tube pasta
Cheese Sauce
1.5 cup (60 g) grated cheddar
1/2 cup (30 g) grated parmesan
1 egg
1 cup (237 mL) milk
Topping
2-3 vine-ripened tomatoes, sliced
1/4 cup grated parmesan
1/4 cup panko
1/2 tsp garlic powder
1/4 tsp cayenne pepper (optional)
What to Do
Cook the macaroni in salted water until al dente. Drain and set aside.
Mix topping: Combine panko, parmesan, garlic powder and cayenne pepper.
Meanwhile, preheat the oven to 350F (175C). Lightly grease a 9″ x 13″ (35cm x 24 cm) baking dish. Set aside.
In a large, deep pan, heat oil over medium heat. Add the onions and garlic, and sauté for 2 minutes. The add the remaining vegetables. Sauté for 5 minutes or until the vegetables are tender.
Remove the vegetables from the heat, stir in the pasta and set aside.
In a separate bowl, whisk the eggs, milk, mustard, salt, pepper and cayenne together until combined.
Pour over the macaroni and vegetables, and add the cheese, stirring until combined and cheese is melted in.
Gently pour macaroni mix into the baking dish. Top with tomatoes, and then sprinkle topping on.
Bake for 15-20 minutes, or until golden brown.

This is definitely a macaroni & cheese that all elbow pasta should aspire to.
]]>
January is definitely the month of tight budgets, both money-wise and diet-wise, and I can’t say that I’m the exception. While it’s nice to imagine that while traveling between New York, London and Edinburgh over the holidays, I ate well, didn’t spend much money and therefore don’t need a quiet January, that’s just not true. (Then again, my January hasn’t been as healthy and frugal as I’d have liked either.)
This meal, however, is something no one has to feel guilty about. I first grabbed this recipe from The Kitchn, and went back to it for a great January meal. (By the way … how is it nearly February? When did that happen?)
For what it is, this panade is way tastier than I expected. It has deep, rich flavors and is super-hearty. One portion is a lot more filling than it looks!
I had some whole wheat bread loaf butts hanging around in my freezer waiting for such an occasion, and it worked perfectly. Worth noting: I tried freezing and reheating, and while it needed a little bit of water before going in the microwave, it worked out really, really well. Also, if you want to make this vegan, you can leave out the cheese without losing too much. Just be willing to adjust your herbs and spices to compensate.
Hopefully your 2013 resolutions have gone well so far! And if it involves using up bread butts, now’s your chance.

Adapted from: The Kitchn
Serves: 4 (at least!)
On the Counter
1 tablespoon olive oil
1 medium onion, diced
5 cloves garlic, minced
2 14.5 oz.(400g) cans of tomatoes, whole or diced, undrained
1 cup (240 mL) hot vegetable broth
2 tablespoons Demerara sugar
1 bay leaf
1/4 to 1/2 teaspoon of red pepper flakes
1 teaspoon oregano
1 teaspoon thyme
2 thick slices old whole wheat bread
1 16 oz. (400 g) can of white beans, such as cannellini or navy, drained and rinsed
2 cups (50 g) fresh spinach leaves
1/2 cup (40 g) grated cheddar cheese, plus extra for garnishing
salt and pepper
What to Do
In a thick-bottomed soup pot, heat the olive oil over medium heat. Add onions and saute until translucent and soft, about 5-7 minutes. Add in garlic and saute for another minute.
Add in canned tomatoes. If using whole tomatoes, crush them with a wooden spoon. Follow it up with the broth, one tablespoon of sugar, bay leaf, red pepper flakes and salt to taste (about 1 teaspoon is a good place to start).
Stir and increase the heat until it boils, then reduce to a simmer for 10 minutes.
Remove the bay leaf. Add in bread and beans, and stir. Make sure the bread is well covered.
Simmer for at least 5 minutes, or until the bread has become soft and mushy. Break it up with a wooden spoon.
Remove from heat. Add in spinach, and let it sit until just wilted, about 1 minute.
Stir in the cheddar. Add more salt and black pepper to taste. If it tastes bitter, add
the remaining sugar and stir.
Serve in bowls, topped with a bit of freshly grated cheddar.

I love this dish! It’s so easy and filling, and it really feels hearty and comforting. Plus, there’s pretty much no guilt in this dish. With only two slices of bread in the whole thing, it’s definitely not a calorie deal-breaker.
]]>
This is an easy one. I like making this when there’s a beautiful trout sitting at the fishmonger waiting to be taken home and treated right.
With a nice piece of fish, I prefer to do as little as possible so that it shows just how tasty it can be. I know there are still a lot of people out there who don’t like fish, but I really think that a lot of times, that’s a case of mistaken identity. Badly-prepared fish can turn anyone off. That stinky smell of old fish turns me off just as fast as even the most ardent fish-hater. But a good piece fish… heaven.

This baked trout looks beautiful on a plate and whispers “elegance”, without much work on your part.
I served it with fresh steamed peas tossed in a tiny bit of butter, but if I’d had petit pois (little peas), I would have definitely used them. The butter is also optional!

Serves: 4
Difficulty: Easy
On the Counter
4 trout filets, with skin
1 lemon, sliced
2 tbsp olive oil, divided
1 tbsp herbes de provence
(or a mix of dried thyme, rosemary, savory, basil, whichever you have)
kosher or ground rock salt
freshly ground black pepper
What to Do
Preheat oven to 350F/150C. Line a baking tray with foil and drizzle with 1 tbsp olive oil.
Pat the trout filets dry with a paper towel, then place them on the foil and season them, skin-side down, with salt and pepper. Let them sit for 3 minutes.
Drizzle them with the remaining tablespoon of olive oil, then top with the herbes de provence.
Lay the lemon slices atop the filets, and if there are any extras, along the sides of the fish.
Roast in the oven for 1o minutes, or until the fish is opaque and flakes easily.
Serve!
I usually squish the lemon onto the fish with a fork. The lemon juice works really well with the trout and herbs.
